When you turn on your computer, all you see is the Windows 10 logo with spinning circle? Stuck on Windows 10 black loading screen? Let’s fix it!
Hello~ If your answer is “YES”, you should keep reading this article.
Good day everyone! We are here to help you. Probably, most of people who are reading this article now now unhappy or upset.. But, do not worry anymore. Here we have some tips that can help you to fix the Windows 10 Automatic Repair Loop as well as the Windows 10 forever loading problem. This similar problems actually not a new one. This problem also happens with older Microsoft Windows Operating Systems like Windows 8.1 and Windows 7. In our understanding, this automatic repair thing started since Microsoft introduced Windows 7. This feature is actually a good feature because it will attempt to repair any hard drive errors or Windows system file corruptions, but for some reason, sometimes, it does not do anything but looping. Let’s get started!
HOW TO ACCESS ADVANCED STARTUP OPTIONS BEFORE WINDOWS 10 STARTS
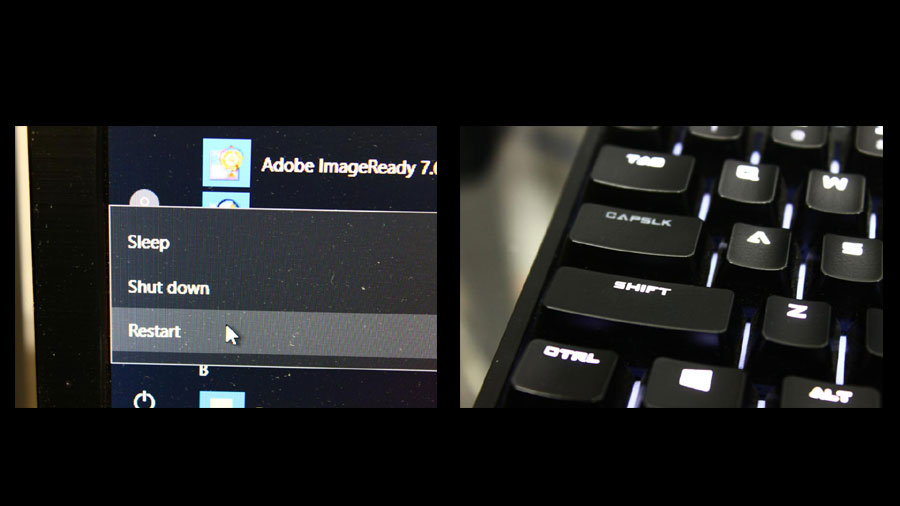
1. SHIFT + RESTART: If you can boot normally to Windows 10, restart the computer while pressing SHIFT key. This will give you access to advanced startup options, but probably, you are not able to load Windows 10 properly, then you will need a Windows 10 Installation (or recovery) disk.
2. Windows 10 Installation (or recovery) Disk: If you cannot load Windows, you need an installation disk to access advanced startup options. Don’t have it? don’t worry. Here is how to create one! How to create bootable Windows 10 & 8 USB (OR DVD) – https://www.pntbrother.com/how-to-create-windows-10-8-bootable-recovery-usb-dvd-disk/
This tips also work with Windows 8.1 and Windows 8. So, if you do have Windows 8.1 or Windows 8, you can go ahead and try all of our solutions to fix the preparing automatic repair loop!
1. WINDOWS 10 STARTUP REPAIR
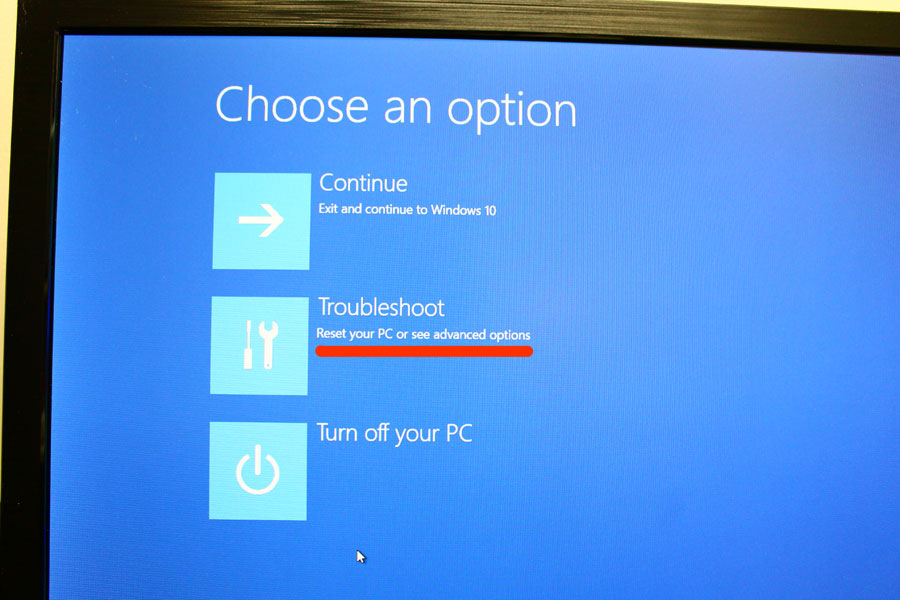
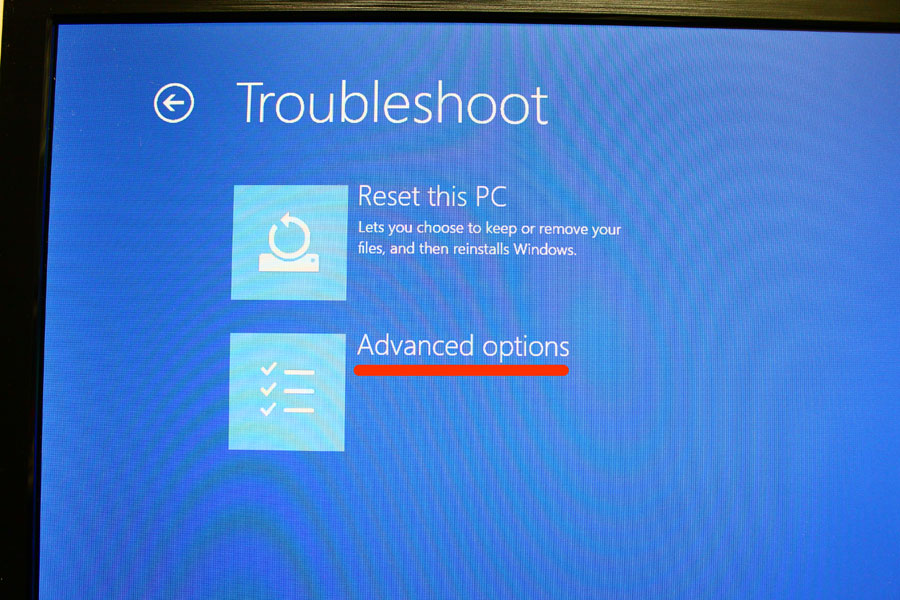
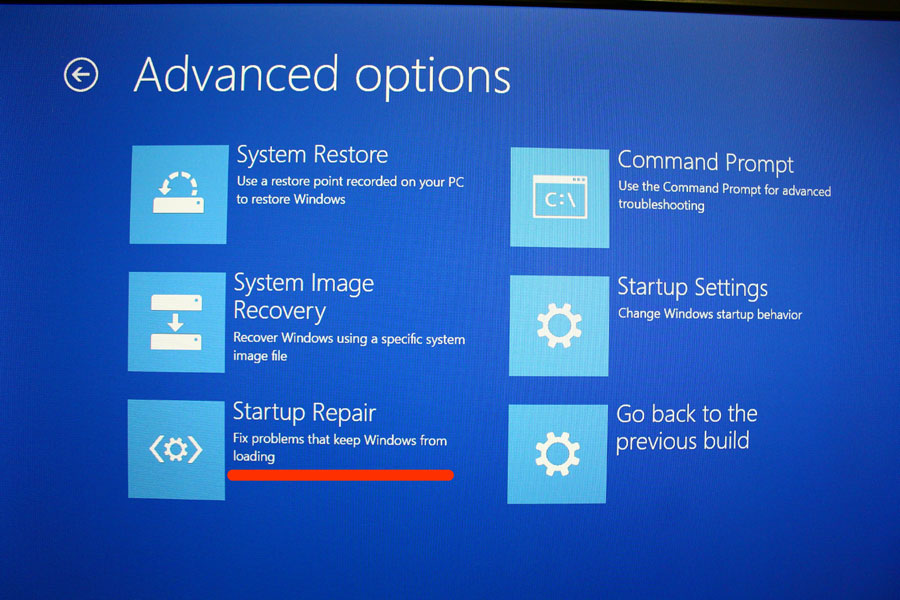
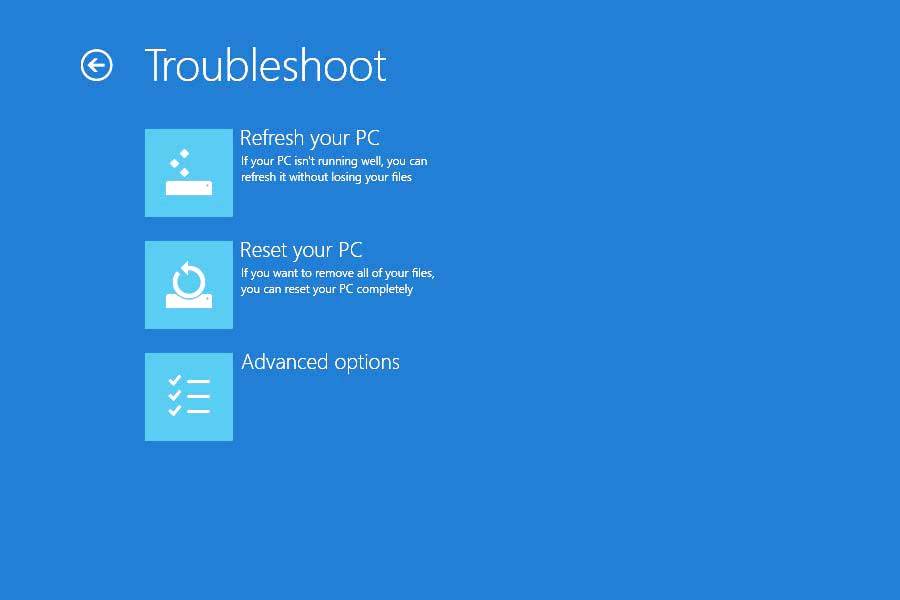
Let’s try the “Startup Repair” first. This is the most simple thing you can try. You must access this advanced options using Windows 10 USB or DVD. Click “Troubleshoot“, and click “Advanced options“, then click “Startup repair“. If this does not fix your Windows 10 boot issue, don’t worry. Let’s try the next step.
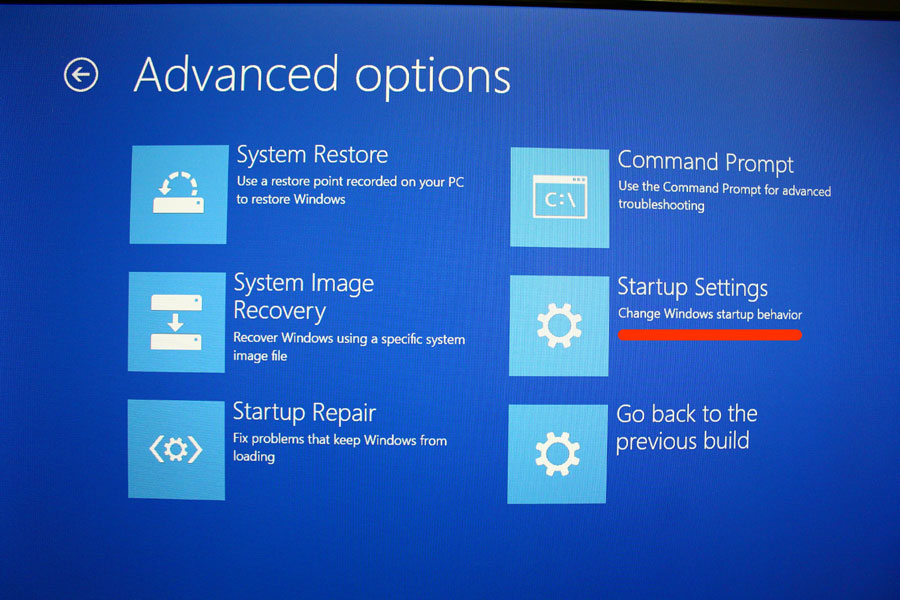
2. START WINDOWS 10 IN SAFE MODE & RESTART
If the “Startup Repair” did not work. It is time to boot “Safe Mode” and restart your computer. In some cases, it fixes the automatic repair loop, and we actually have fixed this automatic repair loop with this method before. Let’s try it. In “Troubleshoot“, click “Advanced options“, then click “Startup Settings“.
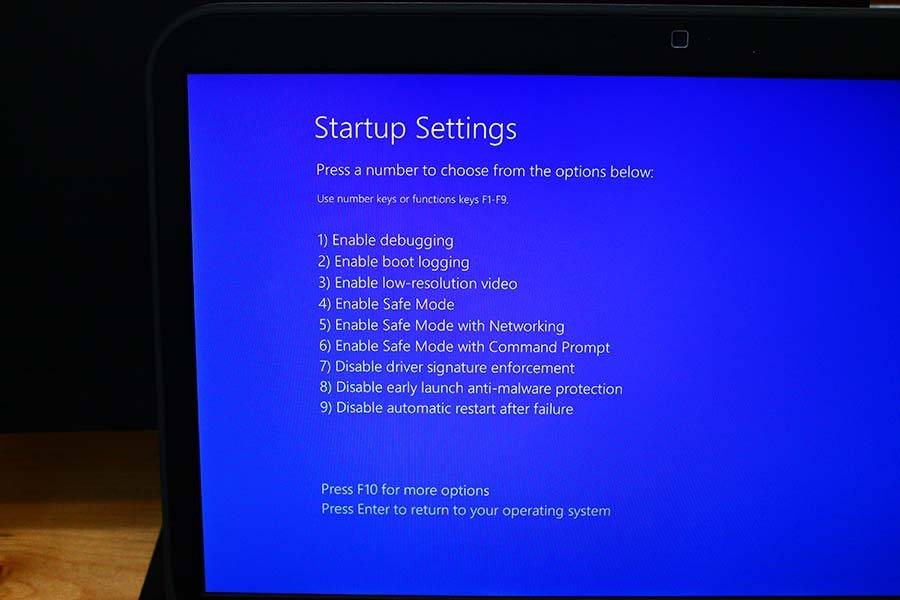
Once you click the “Startup Settings“, you will need to restart. Before you restart, you will see something like picture above. Press F4 or F5 (it does not really matter which key you press) to load Windows 10 in safe mode. If it successfully loads the Windows 10 in safe mode, restart your computer, and the preparing automatic repair won’t bother you anymore.
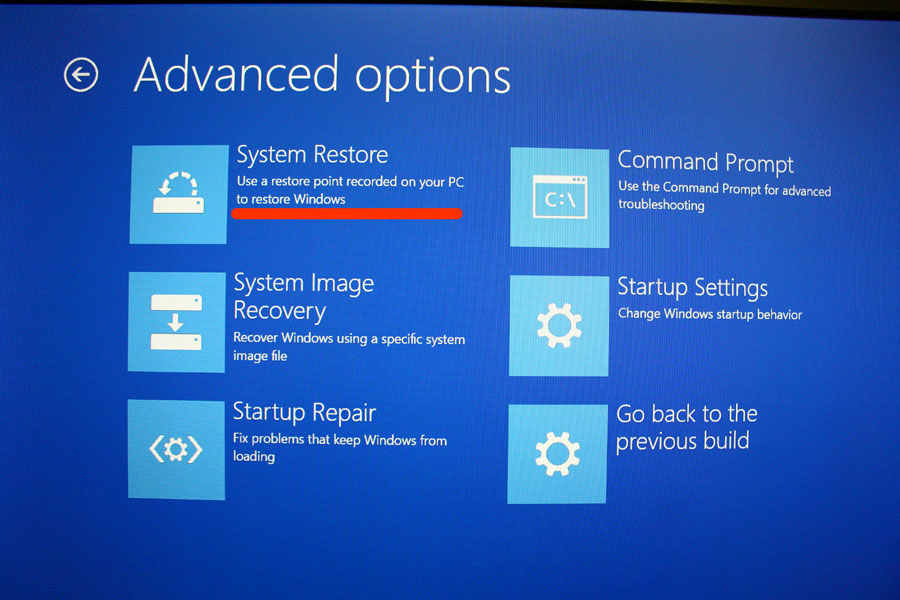
3. WINDOWS 10 SYSTEM RESTORE
If the “Safe Mode” & “Restart” did not work for you, It is time to try something different. It is called “System Restore“. While you are using Windows 10, the Windows 10 creates system images in the background in case when Windows 10 system goes wrong. By performing “System Restore“, you can roll back your Windows 10 to it’s previous saved Windows 10 state. To do it, Click “System Restore” in “Advanced options”.
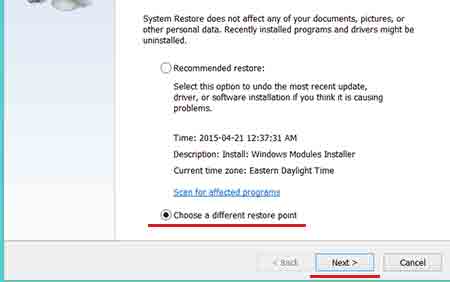
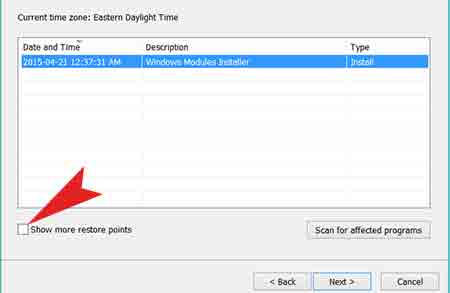
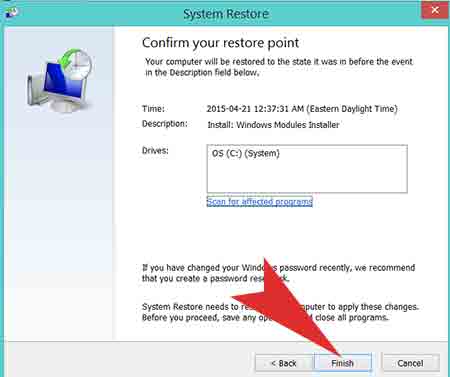
You can just choose “Recommended restore” (which will be the latest Windows 10 restore point) or you can also “Choose a different restore point“ (You can choose any available Windows 10 restore point manually). Choosing the second one, and in the next step, you will need to choose which restore point you want to go back. You may see only one restore point, but check the “Show more restore points” to see all available Windows 10 restore points. After choosing a restore point, click “Next” to proceed “System Restore“.
If the restore point that you selected fails, try other restore point before you try our next solutions. Sometimes, some restore point won’t work.
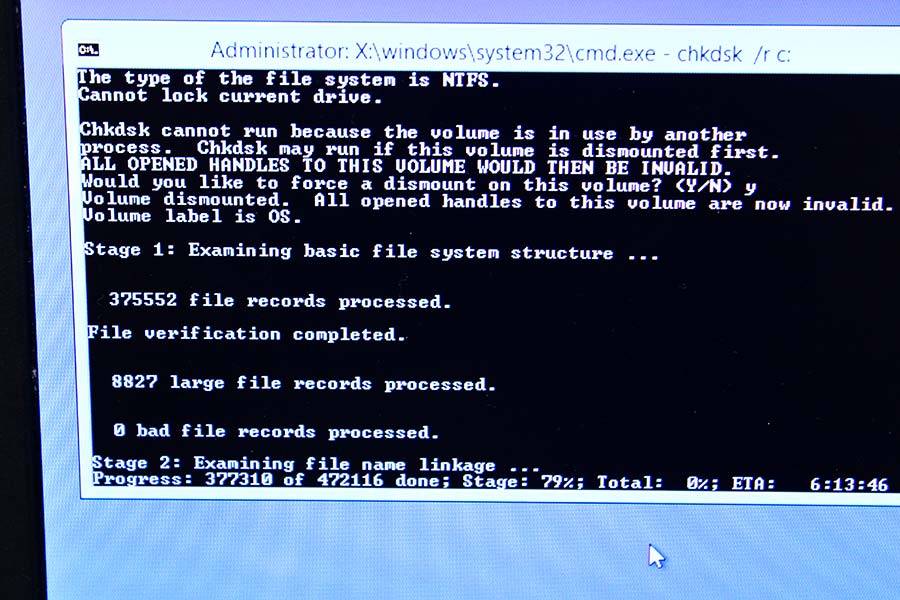
4. BOOTREC & CHKDSK IN CMD (WINDOWS 10 COMMAND PROMPT)
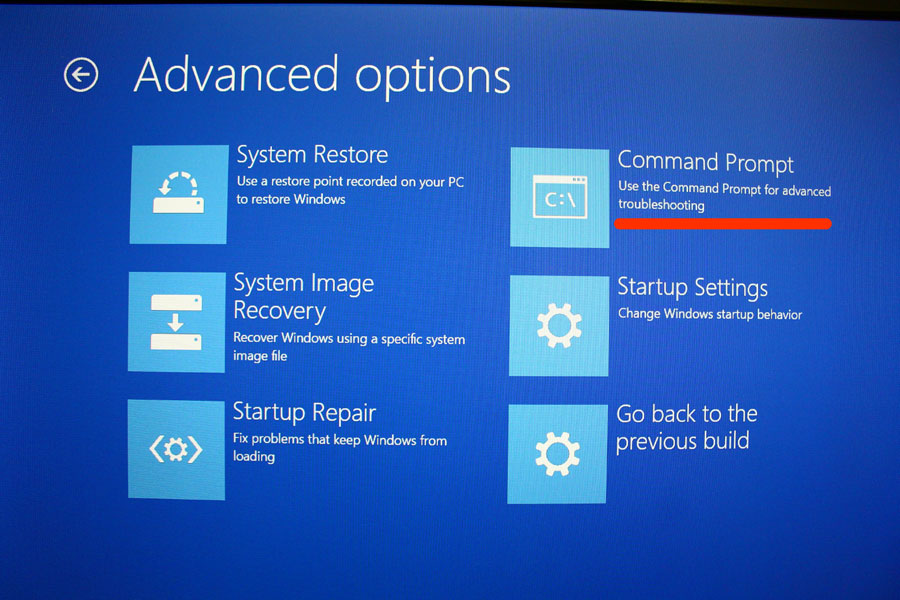
If you are still having the Windows 10 booting issue, let’s try “BOOTREC” and “CHKDSK“ in Windows 10 CMD. You need to use codes, but don’t worry. We will let you know what to type! Click “Command Prompt” in “Advanced options“. This will restart your computer, then it will load Windows 10 “Command Prompt“.
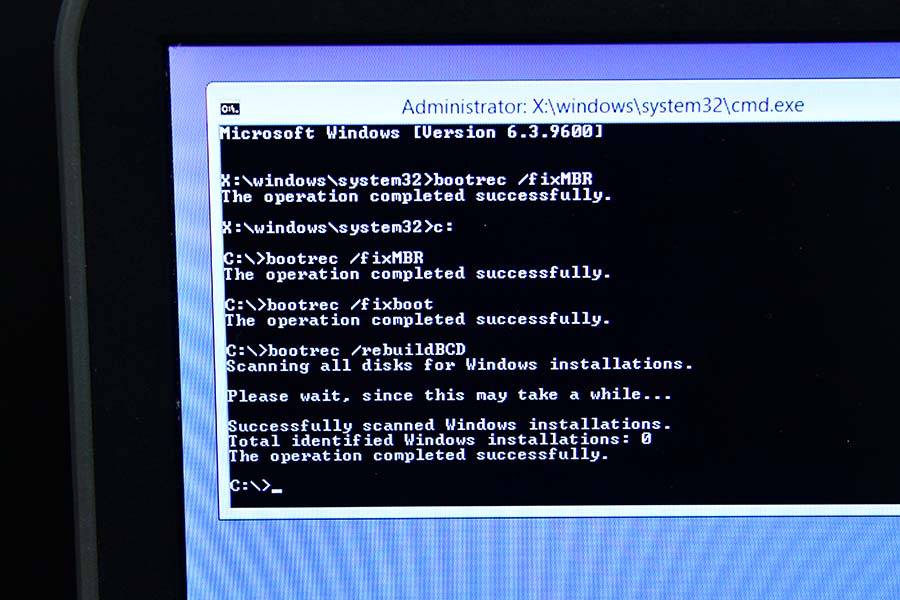
In “Command Prompt“, type the following:
- c:
- bootrec /fixMBR
- bootrec /fixboot
- bootrec /rebuildBCD
This will fix boot section of your hard drive if there are problems with the Windows boot records.
After running the boot record commands, type:
- chkdsk /f /r
- Press “y” to proceed.
This CHKDSK utility checks your hard drive for errors, when it finds something, it will try to fix the error automatically. It will take long time depends on your hard drive capacity so, leave it and get some rest until it is done.  When it is done, restart your computer. Many of hard drive problems including Windows 10 errors can be fixed with this method.
5. DISABLING WINDOWS 10 AUTOMATIC REPAIR ON STARTUP
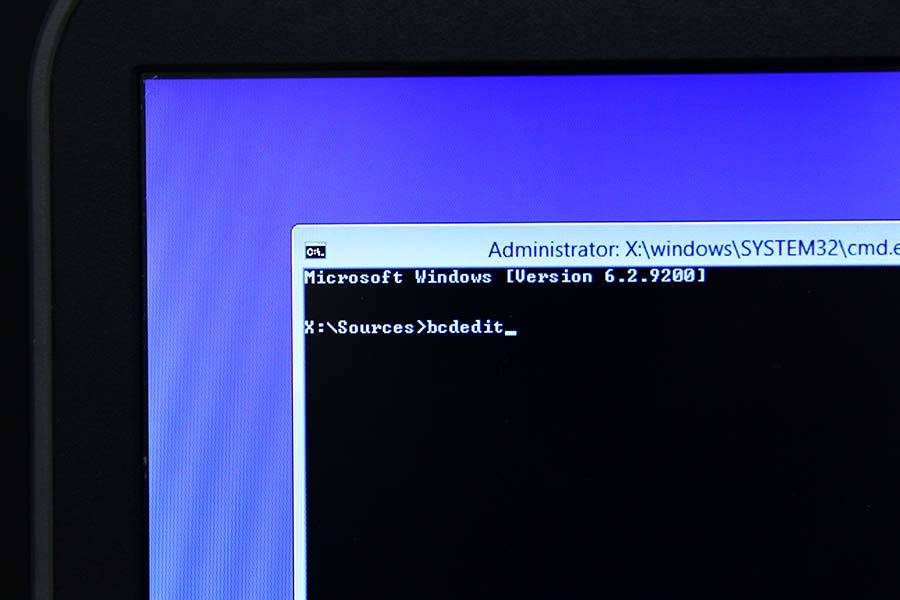
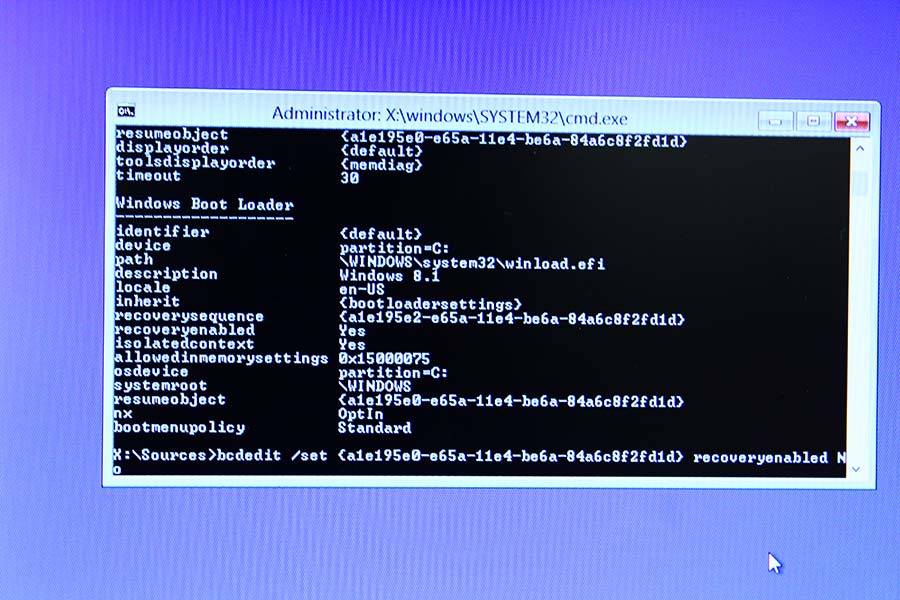
If all of our solutions did not work for your computer, It is time to try disabling Windows 10 automatic repair feature on startup. It will Disable the automatic repair feature when Windows 10 loads. Go to “Command Prompt” again in “Advanced options“, and this time type the following:
- bcdedit /set {current} recoveryenabled No
Or you can try this way: (it is same thing but just a different way. If you have done the above one, you don’t need to do this one!)
- bcdedit
- Under “default” identifier, there is “resumeobject” value. Enter the value in the bracket.
- bcdefit /set {enter your “resumeobject” value here} recoveryenabled No
- Close it, and restart.
6. REFRESH YOUR PC (It is not available on some computers)
Still not working ? Let’s refresh your system. This is one of the easy way to fix the loop, but the reason we try this now is because this will remove all of installed programs. After refreshing, you need to install all programs you need again. (but it keeps all of your personal files such as documents, pictures, and etc) Click “Troubleshoot“, and Click “Refresh your PC“, then follow the refresh instructions. It will take time (faster computer will finish this quicker..)
7. RESET YOUR PC (WINDOWS 10 RESET)
If the “Refresh your PC” did not work, try “Reset your PC“. Please note that it will remove all of your files and settings. (It is a factory default) If you don’t mind loosing your personal files, go ahead and perform Windows 10 reset.
Thank you for reading!! We wish you have fixed your Windows 10 preparing automatic repair loop!! Thank you again, and see you soon!


so i am about to undertake option six however i just wanted to double check a few things first. i have a custom build pc with 2 hdd one has my school files images ext, the other has all probably 300 gigs of my steam library, and while i do have a back up for maybe 180 gigs those backups are about a year old and would require a lot of updates, never mind the other 120 that i haven’t made backups for and really dont want to reinstall at 300 kbs download rate ( screw at&t) would i be able to pull my HDD with my steam library out refresh or god forbid reinstall windows and put said hdd back in without wiping the data ? honestely i would prefer a clean install were it not fore the download and in fact I may do so if it can get in to back up everything that i currently have