Are you facing the loop of “Preparing Automatic Repair” in Windows 8 ?
Hello. Recently, we have repaired a Dell Inspiron laptop with the preparing automatic repair loop issue. We thought only Windows 7 has the startup repair loop, but Windows 8 does it too. This is very annoying because it repeats no matter what you do. Shutting down and restarting your computer won’t fix it at this time. That is why we would like to share what you can try to resolve the repair loop when you have it. 🙂 This could not be the 100% solution, but We hope this blog post is helpful for you. 😀 Let’s get started.
What you can try when you have “Preparing Automatic Repair Loop”
How to access advanced startup options before Windows 8.1
1. SHIFT + RESTART: If you can boot normally to Windows 8.1, restart the computer while pressing SHIFT key. This will give you access to advanced startup options.
2. Windows 8.1 Installation (or recovery) Disk: If you cannot load Windows, you need an installation disk to access advanced startup options. Don’t have it? don’t worry. Here is how to create one! How to create bootable Windows 10 & 8 USB (OR DVD) – https://www.pntbrother.com/how-to-create-windows-10-8-bootable-recovery-usb-dvd-disk/
1. Startup Repair
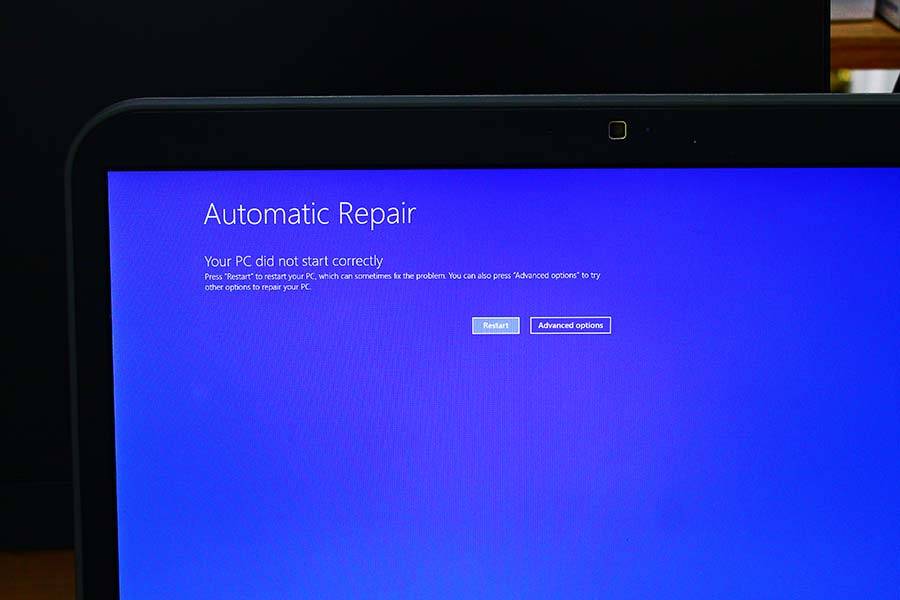
Let’s try the “Startup Repair” first. This is the most simple thing you can try. You are probably facing this blue screen like this after Preparing Automatic Repair. Click “Advanced options.
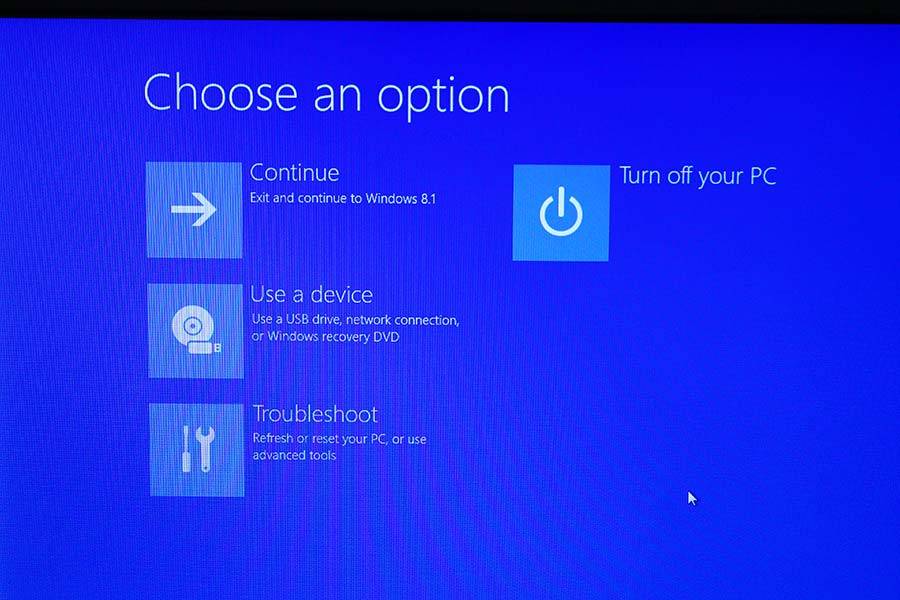
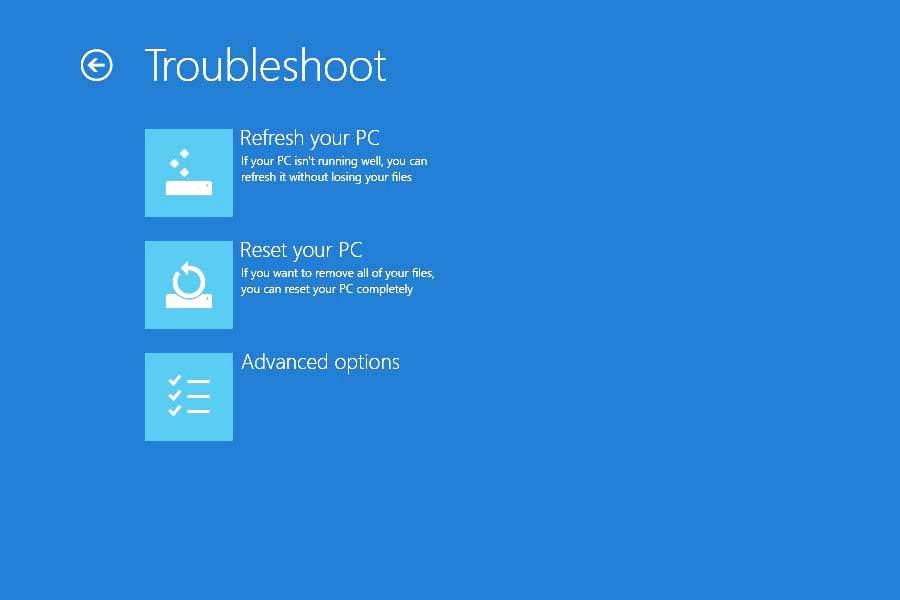
Click “Troubleshoot” to see all the troubleshooting options, and click “Advanced options”
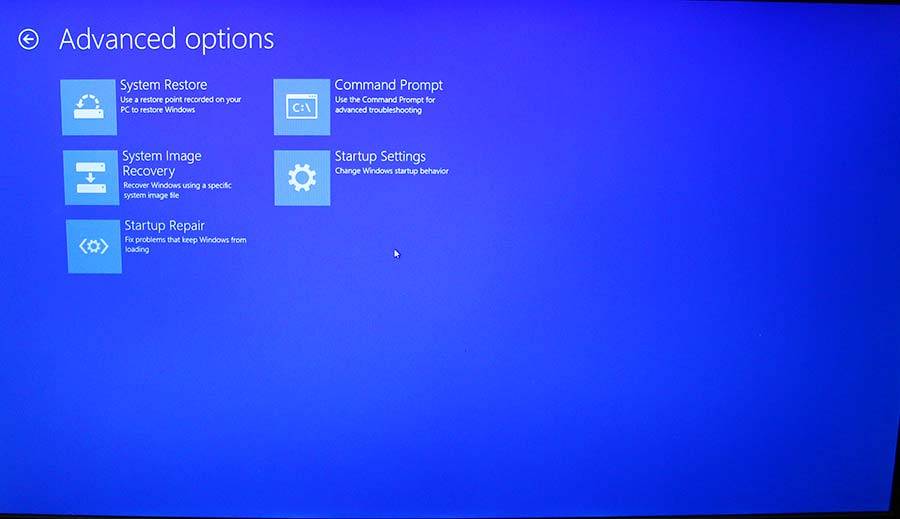
Click the “Startup Repair“.
2. Safe Mode & Restart
If the “Startup Repair” did not work. It is time to boot “Safe Mode” and restart your computer. In some cases, it fixes the automatic repair loop. Let’s try it. In “Troubleshoot“, click “Advanced options“, then click “Startup Settings“.
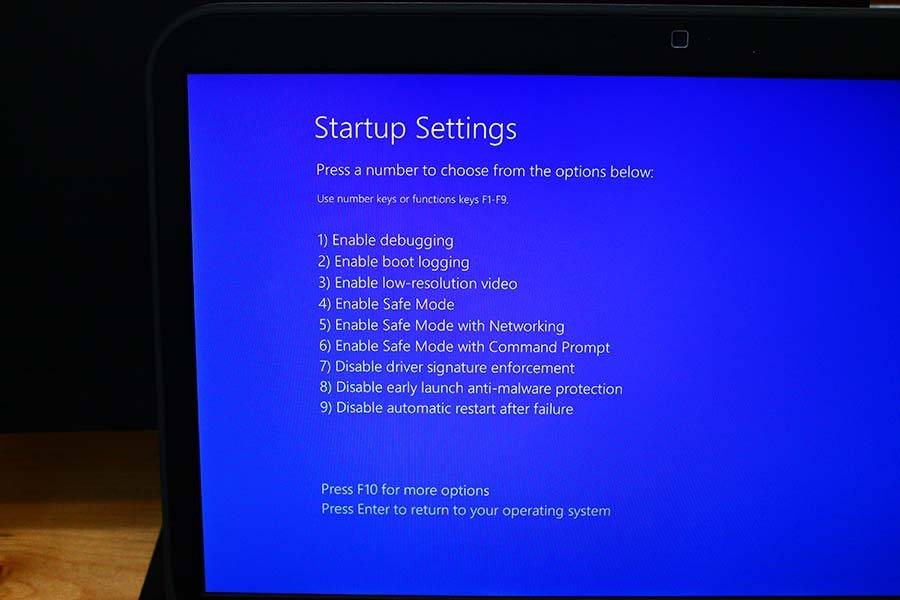
Once you click the “Startup Settings“, you will need to restart. When you restart, you will see something like picture below. Press F4 or F5 (it does not really matter which key you press)
3. System Restore
If the “Safe Mode” & “Restart” did not work for you, It is time to try this. It is called “System Restore“. While you are using computer, the Windows creates system images in the background in case the Windows system goes wrong. By performing “System Restore“, you can roll back your Windows to it’s previous saved Windows state. To do it, Click the “Advanced options” when you see the screen below.
Now, you will see the screen below. Click “Troubleshoot“, and click “Advanced options“.
You will see all the troubleshooting options. Do you see the “System Restore” ? Click it.
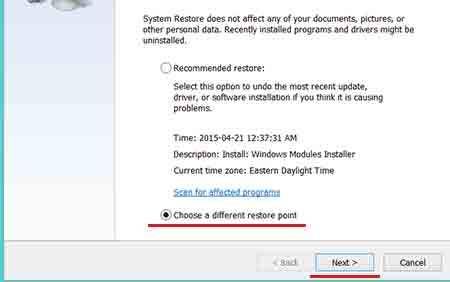
You can choose “Recommended restore” or you can also “Choose a different restore point“. Choose the second one, and in the next step, you will need to choose which restore point you want to go back. You may see only one restore point (which is the latest restore point), but check the “Show more restore points” to see all restore points.
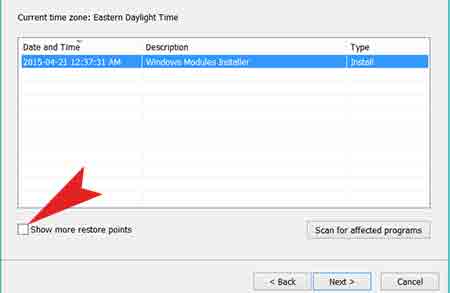
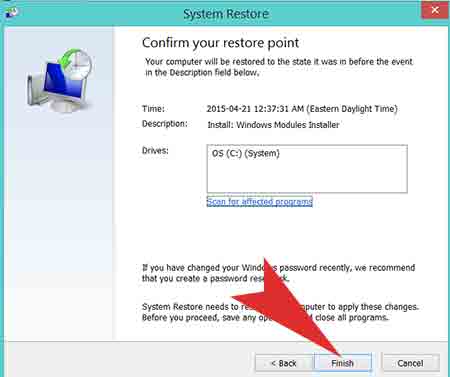
If the restore point that you selected fails, try other restore point. Sometimes, some restore point won’t work with an error code.
4. BOOTREC & CHKDSK
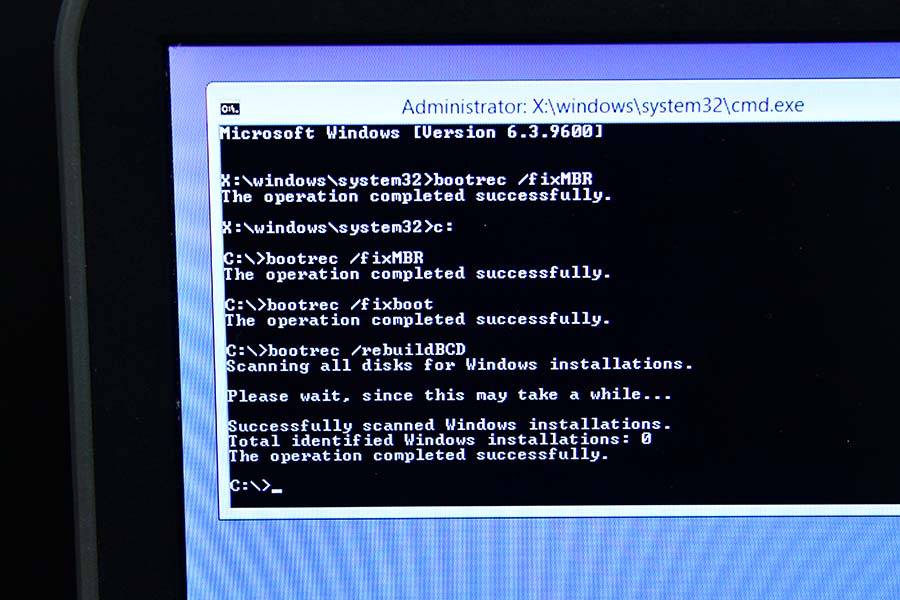
If you are still having the issue, let’s try “BOOTREC” and “CHKDSK“. Click “Command Prompt” in “Troubleshoot“.
In “Command Prompt“, type the following:
- c:
- bootrec /fixMBR
- bootrec /fixboot
- bootrec /rebuildBCD
This is to fix boot section of your hard drive if there are problems with the Windows boot records.
Also, type:
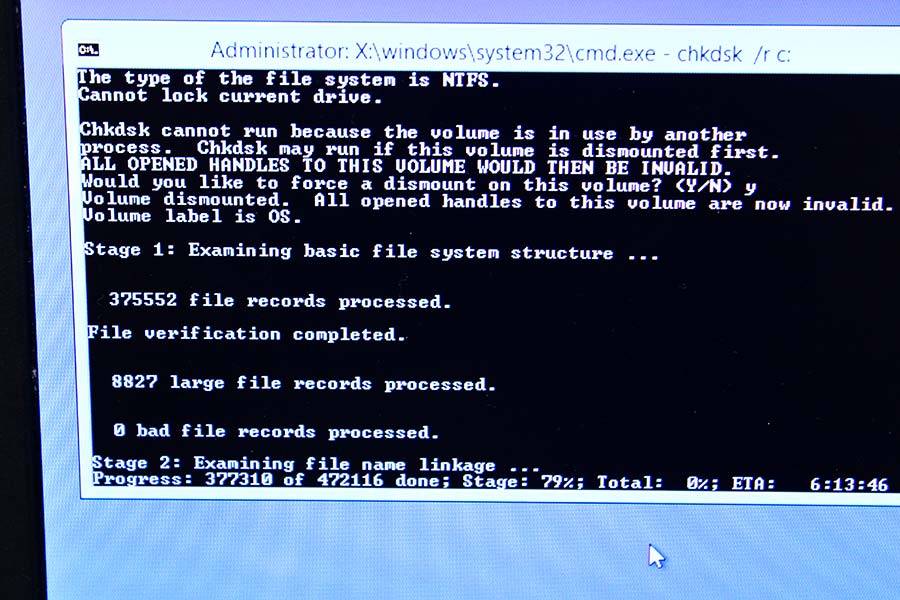
- chkdsk /f /r
- Press “y” to proceed.
This CHKDSK utility checks your hard drive for errors, when it finds something, it will try to fix the error automatically. It will take long time depends on your hard drive capacity so, leave it and get some rest until it is done. 😀 When it is done, restart your computer.
5. Disabling Automatic Repair on Startup
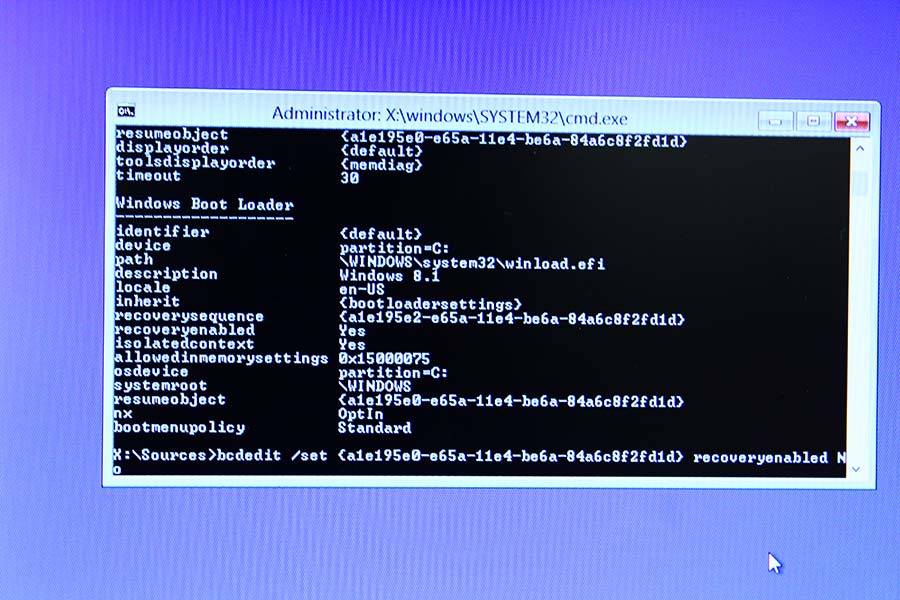
If anything did not work, It is time to try this one. Disabling the automatic repair when Windows 8 starts. Go to “Command Prompt” again, and this time type the following:
- bcdedit /set {current} recoveryenabled No
Or you can try this way: (it is same thing but just a different way)
- bcdedit
- Under “default” identifier, there is “resumeobject” value. Enter the value in the bracket.
- bcdefit /set {enter your “resumeobject” value here} recoveryenabled No
- Close it, and restart.
6. Refresh your PC
Still not working ? Let’s refresh your system. This is one of the easy way to fix the loop, but the reason we try this now is because this will remove all of installed programs. After refreshing, you need to install all programs you need again. (but it keeps all of your personal files such as documents, pictures, and etc) Click “Troubleshoot“, and Click “Refresh your PC“, then follow the refresh instructions.
7. Reset your PC
If the “Refresh your PC” did not work, try “Reset your PC“. Please note that it will remove all of your files and settings. (It is a factory default)
Thank you for reading, and if there are more ways to fix it, you can share it here. 🙂 🙂 🙂 We hope you fixed the Preparing Automatic Repair loop!


Thanks
My problem is similar but not quite the same, and I can’t seem to get to the screen you’re on. My laptop was running an update but failed midway and claimed it needed to undo it. But after it finishes it restarts and tries to finish the update, but fails again. It’s stuck in an infinite loop.
If you have Windows 8 disk (dvd), or in a usb stick, try to boot using one of those, then try system restore to a previous Windows status before the update.
chkdsk is still running and has found 4 errors: Windows 8.1 file record segments 230872 – 230875. Although I have no idea if your advice to run these command prompts will work, I sincerely thank you for your efforts.
I’m not getting the advanced option when I get the automatic repair notification. My computer tries to start and then it says that it is preparing “automatic repair” and then restarts. It will keep doing this until I crash my computer. I have tried everything I know how to do, but my computer doesn’t want to respond. Is there anything else I can do?
Format and reinstall will be the solution then..
Thank you so much. I’m know technology kinda person and when my daughters tablet ran into this problem she was devastated. Not being financially able to take it into a shop to get fixed I turned to Google and YouTube most threads/posts were very confusing using such big words l. With this one I was able to follow it simple as, and thanks to this guide I.have one very happy daughter.
Thank you.
tat was really helping
The “Automatic Repair Screen” did not come up. I just have a blank screen.
You need to load the advanced startup options using a bootable DVD or USB. Here is how to create one. After creating a bootable DVD or USB, you need to boot from the bootable media.
2. Windows 8.1 Installation (or recovery) Disk: If you cannot load Windows, you need an installation disk to access advanced startup options. Don’t have it? don’t worry. Here is how to create one! How to create bootable Windows 10 & 8 USB (OR DVD) – https://www.pntbrother.com/how-to-create-windows-10-8-bootable-recovery-usb-dvd-disk/
Same, I have tried everything to turning it off, pressing f11 (Which did nothing), waiting. Nothing has worked. I’m probably going to take it somewhere to be checked.
What should I do after the safe mode works please help me.
I’m clueless
After you get into the safe mode, just try to restart the computer, and see if it works.
Yes I went all the step above and it didnt fixed my nextbook tablet and it still saying automatic repair is still on a loop I try everything and it didnt fixed i need help is window 10 and i had updates and it still the same in a loop saying automatic repair I NEED HELP ASAP! nenalinda0216@yahoo.com please send me a e-mail message to fix window 10 saying automatic repair thanks
In that case, let’s make a Windows 10 Installation disk, and re-install the Windows 10
After automatic repair, it just goes black and nothing else come out. Please tell me how to fix that. Please and thanks
Thanks it works for me…. I tried almost all the options before but this time I did system restore and now my pc 💻 is in Normal mode. Thanks once again for this wonderful article..
Thanks .👍🏻
I just got my laptop checked and y’all had a virus. When you get your computer running again get antivirus so you won’t experience it again, it isn’t fun waiting. I’ve been waiting for like 3 hours but it’s worth it.
After automatic repair, it just goes black and nothing else come out. Please tell me how to fix that.
How long are we talking with the This CHKDSK repair?