Windows 10, 8, 7 are slowing down ? – There are things you can try to make your Windows 10, 8, and 7 faster !
Today, we are going to share an awesome tips on how to optimize your Windows 8 to perform faster 😀 😀 😀 Normally, to speed up your computer (or laptop), you will need to upgrade CPU, memory or the slow hard drive to a SSD (Solid State Drive: Memory based storage), but this blog post will share some tips on speeding up without spending a cent! (by turning off Windows features) 😀 😀 😀 Some of these steps also apply to older Windows like Windows 7, Windows Vista, Windows XP, and Windows Server product. Since it is not an actual hardware upgrade, it will not get crazy faster than now, but it will surely help your slow computer to perform quicker than now. Let’s get started!
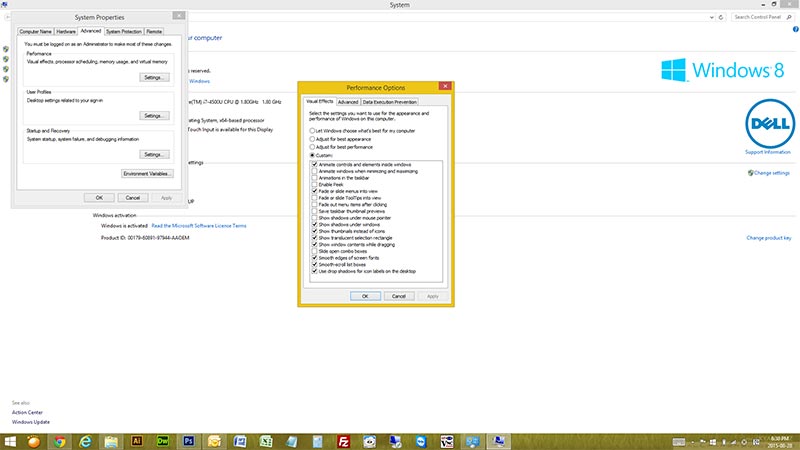
1. Turn off Windows Visual Effects
As many of you already know, the later Windows products have fancy visual effects like Apple Macs. (maybe since Windows Vista) By turning off those graphical effects of Windows, you will lose the fancy visual like fading effect, but it will boost the performance of Windows.
Open “File Explorer” -> On the left side menu, find “This PC” -> Right-Click “This PC” -> Click “Properties” -> On the left side menu, Click “Advanced system settings” -> Click “Advanced” tab -> Click “Settings…” in Performance box – >Turn off every visual effects in the box.
“This PC” in Windows 8 is “Computer” in Windows 7
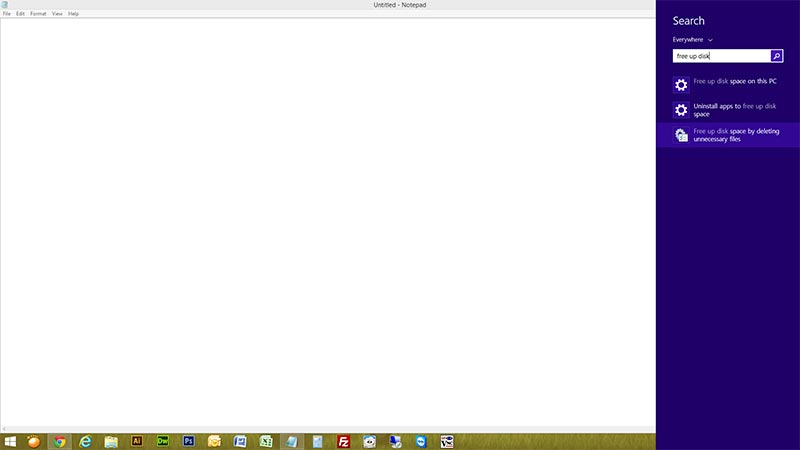
2. Try Windows Disk Clean-up
Windows Disk Clean-up will let you delete unnecessary files that Windows keeps on the hard drive. Using this utility, you can delete Temporary Internet files, Downloaded files, Error Reporting files, Recycle Bin, Windows Logs and more. By removing those files, you can also get more free space! 😀 😀 😀
Bring your mouse cursor to bottom-right corner (or top-right corner) -> Click “Search” -> Type “free up disk” -> Click “Free up disk space by deleting unnecessary files” -> Check all items -> Click “OK”
For Windows 7 -> Click “Start” -> Click “Programs” -> Click “Accessories” -> Click “System Tools” -> Click “Disk Cleanup” -> Check all items -> Click “OK”
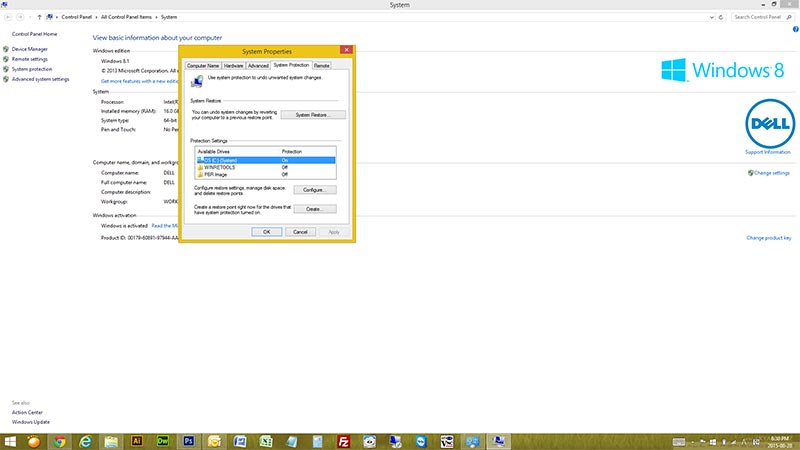
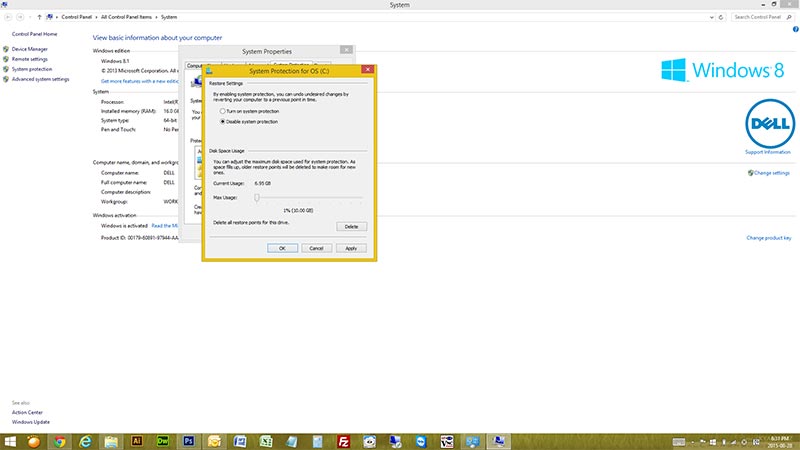
3. Disable Windows System Restore (Be-Careful)
For this one, we are going to disable the automatic Windows System Image backup. As we disable this feature, the Windows won’t make a backup image of your current Windows settings, and therefore, when there is a system corruption or damage, it is hard to restore. Of curse it is safer with the Windows System Restore turned on, but if you are okay with it, and if you really want to increase the speed, turn it off.
If you are a computer expert and do backup your file regularly, then you should turn off this to speed up your Windows 8.
If you are a beginner, and have important data and file on your computer, you better leave it on.
In Advanced system settings -> Click “System Protection” tab -> Find the local hard drive with “On” -> Select the drive -> Click “Configure” -> Choose “Disable system protection” -> Click “OK” to finish
For Windows 7 -> Same as above
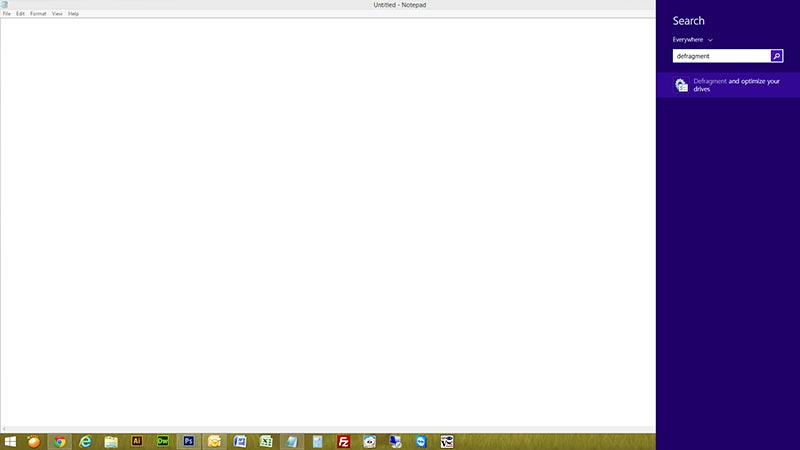
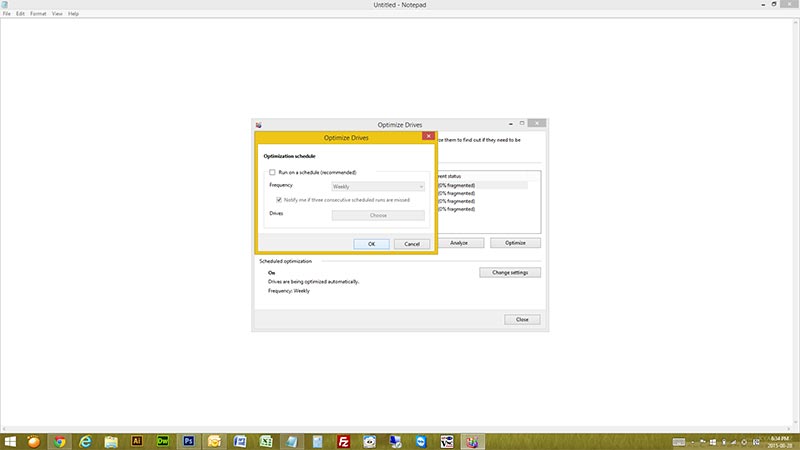
4. Try hard disk defragment and Turn off scheduled hard disk defragment
by default, the Windows does defragment & optimize your hard drive when it needs. Some people say it is better when it is turned on, but if you do not copy and delete files everyday, it is better to turn off the scheduled hard disk defragment feature. Also, let’s try hard drive defragment to increase your hard drive speed. Degragment takes many hours, so try it when you have time.
Bring your mouse cursor to bottom-right corner (or top-right corner) -> Click “Search” -> Type “defragment” -> Click “Defragment and optimize your drives” -> Click “Change settings” under Scheduled optimization -> Uncheck “Run on a schedule (recommended)” -> Click “OK” -> Now, let’s do the defragment -> Select the System Drive (OS Drive) -> Click “Optimize”
For Windows 7 -> Click “Start” -> Click “Programs” -> Click “Accessories” -> Click “System Tools” -> Click “Disk Defragmenter” -> Click “Configure schedule” -> Turn off the schedule -> Now, let’s do the defragment -> Select the System Drive (OS Drive) -> Click “Defragment disk”
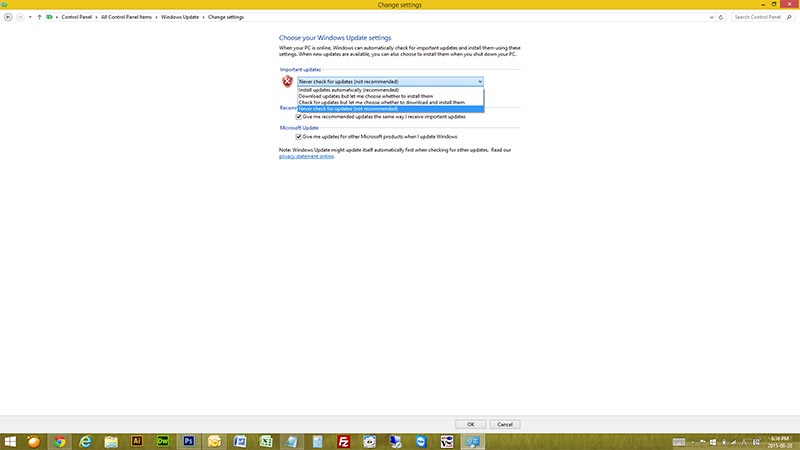
5. Change Windows Update setting
The Windows update feature keeps your Windows secure and perform without bugs and glitches (less bugs…) by installing latest updates from Microsoft. However, the Windows does download and install new updates when your computer is turned on, and when it is in use. This is why when you change the Windows Update to manual way or when you turn off, the Windows will perform faster. You can apply Windows Update when you want. Not when you are working on your laptop (Pc, computer…).
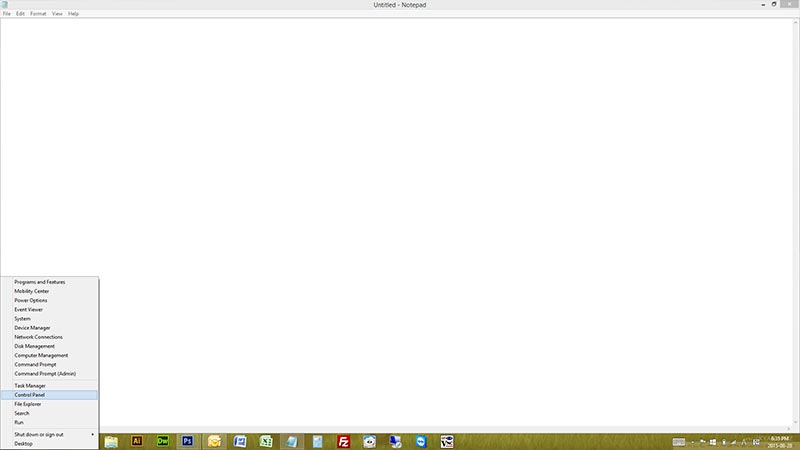
Bring your mouse cursor to bottom left corner -> Right-Click -> Click “Control Panel” -> Click “Windows Update” -> Click “Change settings” -> Change the setting to “Check for updates but let me choose whether to download and install them” or “Never check for updates”
For Windows 7 -> Click “Start” -> Click “Control Panel” -> Click “Windows Update” -> Same as above
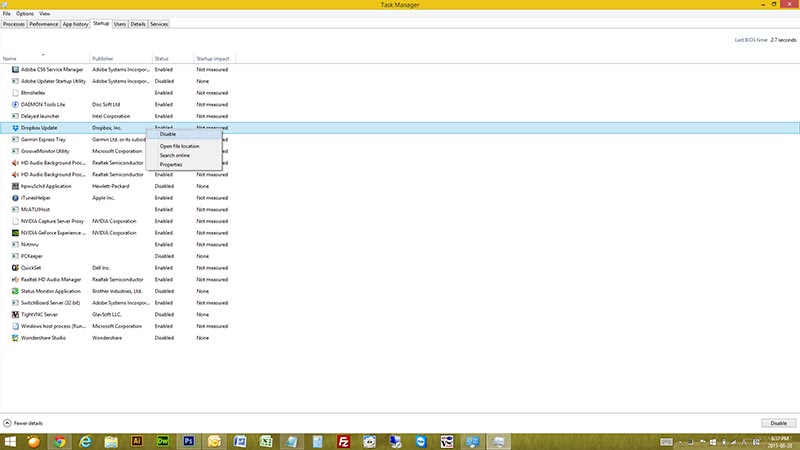
6. Turn off Startup programs that you don’t need
When you first turn on your computer, Windows starts all programs on start-up that are registered as a startup program. Many of them must be turned on but sometimes you will see programs that you don’t want to use. Let’s turn off those startup programs to boost your Windows performance! Less programs you have on startup, the Windows loads faster 😀 😀 😀
On your keyboard, Press “Ctrl+Alt+Del” keys together -> Click “Task Manager” -> Click “Startup” tab -> Select any unwanted startup programs -> Click “Disable”
For Windows 7 -> Click “Start” -> In Search bar, Type “msconfig” -> Click “Startup” -> Select any unwanted startup programs -> Uncheck the items that you want to remove from startup
7. Scan for virus and malware using Malwarebytes Anti-Malware
Your computer maybe slow due to virus, malware, trojan and any other bad software. Let’s try to scan the computer for the last step ! 😀 😀 😀 let’s make your computer clean ! We do recommend a anti-malware software called “Malwarebytes Anti-Malware. It looks like this program is really good at finding malware.
Go to this website to download the Malwarebytes Anti-Malware: http://www.malwarebytes.org/products/
Download the “FREE” version and install. When you are finishing the installation of Malwarebytes, if you check 30 day trial of premium version, you can also experience the full features of Malwarebytes Anti-Malware. Run the program, and click “SCAN”. This will start the scanning and it will find all the malware and threats. When the scanning is done, Check all detected items, and click “REMOVE”.
Your Windows 10, 8, 7 will perform lot faster than before !
We hope everyone liked our awesome blog post. Thank you for reading and if you have any questions, leave a comment here. 🙂 🙂 🙂